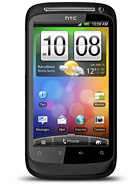
Here's a simple steps on how to set up POP3 and IMAP email accounts on your HTC wildfire S.
The Android-based smartphones include two email clients, one for Gmail and one for other types of email servers including Microsoft Exchange, IMAP and POP3.
The following guide will show you how to set up the built-in email application on the HTC Wildfire S to access an IMAP or POP3 email server for incoming email, and an SMTP server for outbound email. The setup for both IMAP and POP3 is the same.
- Tap the Home icon
- Tap the Grid icon so you can view all installed applications
- Tap the Email icon
- Enter your Email Address and Password for the account you are setting up and tap Next
- Select the type of account: POP3, IMAP, Microsoft Exchange ActiveSync; select either POP3 or IMAP, as appropriate (figure 4)
- Enter the Incoming server settings: Username, Password, POP3 server (ex: pop.yourdomiain.com), Port, Security type, and Delete email from server, then tap Done, and then Next
- Enter the Outgoing server settings: SMTP server (ex: smtp.yourdomain.com), Port, Security type, Require sign-in (check box), Username, and Password, then tap Done, and then Next
- You can now select Account options: Email checking frequency (15 minutes by default), Send email from this account by default (check box), and Notify me when email arrives (checkbox) -- make your selections and tap Next
- Your email account is now set up on your HTC Wildfire S and must be named -- also be sure to enter your name to be displayed on outgoing messages
- Account name
- Your name
- Email check frequency
- Default account (make the current account the default email account on your HTC Wildfire S)
- Email notifications
- Select Ringtone
- Vibrate
- Incoming settings (to modify IMAP or POP3 server settings)
- Outgoing settings (to modify SMTP server settings)
Oddly, if you want to add another email account to your HTC Wildfire S, it is done while viewing the message list of an account that has been previously setup. Tap the Menu icon -- which is directly to the left of the Home icon -- and then tap Accounts. Then start from the top of this guide to add another account.


0 comments:
Post a Comment