How to Factory Reset Samsung Galaxy Note 2

Performing factory reset on your Samsung Galaxy Note 2 will ease you from severe lag, hang, frozen issues. If you want to make your device in a re-fresh condition then factory reset may solve it all. This may also useful if you need to wipe all data and restore the device to its original default settings. One downside of doing factory reset is that you need to make a back-up copy of all important files you have saved on it, for it will all be deleted once the process done. If your Galaxy Note is rooted, then its been easy for you to make a back-up all of it via CWM recovery. For unrooted devices you can use any back-up apps like Samsung Kies that sync all your data and saved it to the computer.

Factory Reset via Settings

From Home screen tap on "Settings" Tap on "Select Back up and Reset" Choose "Factory Data Reset" Reset all settings and delete all data on device. Enter "Reset Device". Then, select "Erase Everything".

Factory Wipe Data/Factory Reset via Recovery Mode

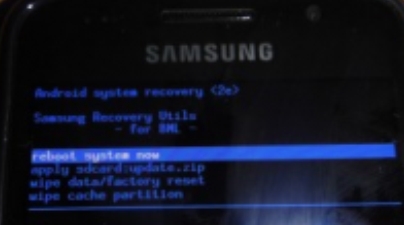
Turn the Power off. Gently press and hold down Volume Up + Home + Power buttons simultaneously. Release all keys once the Logo appears. You will then prompted in a Android System Recovery options. Now, scroll down using Volume keys, and choose "Select Wipe Data/Factory Reset" Enter your selection using the "Power" button Select Yes — "Delete All User Data". Then, select "Reboot System Now".

Wait until the device will then completely reboots. You can repeat this process if you need to restore back your Samsung Galaxy Note 2 to its original default settings.

Download Samsung Galaxy S3/S III GT-I9300 User Manual

Here's the Samsung Galaxy S III GT-I9300 User manual which may help you out in navigating your device through its full features and capabilities. The Samsung Galaxy S3 is powered with the latest Android Ice Cream Sandwich OS and browsing through it's system is quietly different  from those older Android devices that runs with Gingerbread OS. This brand new Samsung flagship smartphone was sold in astonishing record - best selling in 2012 since it's released. So, you might be one of those millions user's worlwide probably looking for this manual.
Samsung Galaxy S III GT-I9300
Here' it is! download it from Samsung's official website http://downloadcenter.samsung.com/content/UM/201206/20120608141856590/GT-I9300_UM_EU_Icecream_Eng_Rev.1.0_120607_Note.pdf , everything you need to know about your newly owned Samsung Galaxy S3 is on it. Enjoy!
Samsung Galaxy S3 S III GT-I9300 User Manual
More useful hints about your Samsung Galaxy S3 like the following:
- Recording a Call on the Galaxy SIII handset
- How to remove the Memory Card on the Samsung Galaxy SIII
- Issue with the 'S Voice' feature on the Galaxy S III handset
- How long does the Warranty period on the new Galaxy S III handset last for?
- Viewing Phone images under Gallery, on the Galaxy S III
Can be found via Samsung Support for GT-I9300 page.

How to take screenshots on Samsung Galaxy Note Upgraded with ICS Android Ice Cream Sandwich

This is now exactly how it works to take a screenshot on Samsung Galaxy Note that already upgraded and running with Android Ice Cream Sandwich ICS 4.0.3 OS. Once you already updated your Galaxy Note to ICS, the screen capture hotkey combination is now change to Volume Down and Power buttons (originally [Home] + [power] when it was in 2.3.6). This function was the same on Samsung Galaxy S2 that also updated with ICS 4 OS and probably will work on other Samsung android devices that already runs with said Ice Cream Sandwich OS.


You'll just then simply press and hold the Volume Down and Power buttons at the same time for about a second. You’ll see a flash and the screen will be framed which shows the screenshot was taken. A new notification in the notification bar saying "Saving Screenshot" and once it’s done there’ll be a "Screenshot captured"” notification in the pull down menu which will take you directly the screenshot in the Gallery.

The screenshot will be saved on your phones internal SD card - in a folder /Pictures/Screenshots. That's it, enjoy!

HTC One X Factory Reset: Fix Bugs and Problem Issues

If you have a  HTC One X at hand and notice some bugs and issues regarding your device and wanted to fix it accordingly the only solution for now is by doing a factory reset. This is only a temporary option just for now until your device will get a new OTA firmware updates. I hope for those who plans on buying the the HTC One X, please don't get disappointed, this is only some minor glitches from the software and also happens on some other Android devices. As I already mentioned, this can be easily fix by another software update sooner, but until there is no update yet, this is the simplest solution.

Here's a known bugs and issues that have reported by HTC One X users that have been brought together   from XDA-Developer forum. Thank's to H-Cim for starting the thread and all the HTC One X users who participated and came up with some known bugs and issues altogether.

Bugs
  • Screen stops turning orientation, even in settings menu G-sensor no longer moves. - POSSIBLE FIX : Go to taskmanager and kill all tasks - All credit and thanks go to casca
  • Calendar widget crashes if more then 20 appointments - TIP : Just remove the widget since it will keep crashing until you remove it...
  • Other HTC widgets seem to be causing lag too.
  • GPU Rendering can't be forced.
  • Live wallpaper stops on switching between screens
  • GPS issues - Possible fix : Download gps status on the market and clear the a-gps data - if this works all credit and thanks go to matmar
  • Screen starts "jumping"
  • When browsing/camera/other Sense 4.0 related tasks -> It looks like there is "noise" on the screen. Like this
  • SIM card stops working/restarts/no connection
  • The three dot menu button appears in some ICS native apps, like the YouTube app for example. - Fix for this in Dev section (requires unlock)
  • Tegra 3 games (and some others) lag, this is probably connect to some video driver bug. (Hardware is fast enouf to play it without lag)
  • Screen reactivating after using the lock-button (only 1 click ofc)
  • When opening the Clock app (just by pressing the clock on your homescreen), and moving to the Timer-tab (the one on the far right) it always adds one hour, one minute and one second to whatever time you set it to.
Issues
  • Lag in Multi-Tasking window and other elements - TIP : Go to Dev Settings - disable animations. This improved the speed a lot for me (even thou most animations keep on running, only the excessive ones get turned off) [This lag is clearly a software issue, other launchers are lag-free; should be fixed soon]
  • A lot of people are reporting signal problems. (No clue what's causing it)
  • Yellow spots on the screen
Here's how to Factory Reset the HTC One X.

If you’re passing HTC One X on to someone else or HTC One X has a persistent problem that cannot be solved, you can perform a factory reset (also called a hard reset).

Warning: Factory reset will permanently delete all your data and customized settings, and will remove any applications you’ve downloaded and installed. Be sure to back up any data and files you want to keep before you do a factory reset.

Performing a factory reset from settings


   1. Slide the Notifications panel open, and then tap .
   2. Tap Storage > Factory data reset.
   3. Tap Reset phone, and then tap Erase everything.

Performing a factory reset using hardware buttons

If you can’t turn HTC One X on or access settings, you can still perform a factory reset by using the hardware buttons on HTC One X.

   1. Press and hold the VOLUME DOWN button, and then press and hold the POWER button.
   2. Wait for the screen with the three Android images to appear, and then release the POWER and VOLUME DOWN buttons.
   3. Press VOLUME DOWN to select FACTORY RESET, and then press the POWER button.

If the problem still persist after performing hard reset, you might need to wait the new OTA software update from HTC. A software update fro HTC devs will only fix all known bugs and issues mentioned above for your HTC One X.

Dealing with AudioOut_1 Partial Wakelock on Samsung Galaxy S2 that runs in Ice Cream Sandwich (Fix battery fast drain issue)

Recently, most Samsung Galaxy S2 users who are already upgraded to the latest Android 4.0.3 Ice Cream Sandwich (ICS) talking about the problem of a wakelocks as caused by the Audioout_1. This has been noticed by using Better Battery Stats on the new ICS firmware with the Galaxy Nexus, causing the battery draining fast, while when listening Audio like Google Music, the Sirius/XM app or perhaps just happens when doing nothing at all. So, if you'll also newly upgraded your Galaxy S2 to the newest Ice Cream Sandwich firmware and experience this kind of issues too, this might help you to solve that problem. This reportedly occured on firmware with build number I9100XWLP2, I9100XXLPQ and I9100XXLP7, other carrier branded version like T-Mobile and Vodafone with firmware build I9100BOLPD  and I9100BULPC and on later version were not already been tested.

According to some users experience that the AudioOut_1 Partial Wakelock appears to be connected to the Touch Sounds and Screen Lock Sounds options in the phone's Sound Settings. So, to disable or shutting down the Touch Sounds & Screen Lock Sounds in Settings will fix the the battery draining problem.

What is AudioOut_1 basically?

"AudioOut_1" is a Wakelock that is basically a kernel process that funnels data from audio apps to the audio hardware. It's what processes audio from say, Pandora or Slacker Radio, and passes it to the phone's audio hardware. (from toms-world.org)

Here's how to fix the AudioOut_1 Partial Wakelock problem:

Go to > Settings > Sound
Uncheck this options:
"Keytones"
"Touch sounds"
"Screen lock sound"

how to fix AudioOut_1 Partial Wakelock on Samsung Galaxy S2 running with Android Ice Cream OS
I just left the "Ring and Screen Tap" vibra option" on mine.
I tried it and it happens that my Galaxy S2 went in an hour losing only 1% of the battery and the results the WakeLock percentage for AudioOut_1 goes down as I check back into BetterBatteryStats. Unlike before that I have about 10%-15% battery drain even when my Galaxy S2 is on idle mode. So, just try it out. Enjoy!

How to Boot Samsung Galaxy Note into Recovery Mode when Firmware Upgrade Encountered an Issue

Pressing the Volume UP+Home+Power buttons will boot your Samsung Galaxy Note into Recovery Mode. This is useful if you encountered an issue while upgrading your device firmware and something happens that it just suddenly stuck on a screen and it only displays "Firmware upgrade encountered an issue. Please select recovery mode in Kies and try again." Then the PC will not recognize your Galaxy Note even if you already connected it.

Here's what you have to do next if it happens that you might also encountered this kind of situation. 
1. Remove the battery of your Galaxy Note (If you can't turn it OFF while stuck on the error screen)
2. Put the battery again but don't power it yet again. This time press the recovery mode button combination.
Press and hold the Volume UP+Home+Power buttons until a recovery mode screen appears. 
3. Use Volume Up and Down keys to toggle these options.
 reboot system now
apply sdcard:update zip
wipe data/factory reset
wipe cache partition

Samsung Galaxy Note  into Recovery Mode
4. Select the the first option "reboot system now" then wait until the device will reboot normally.
If the device will not boot into a welcome screen and just stuck or freeze,  go back to recovey mode again.
5. This time select the "wipe data/factory reset" (Note: this will delete all the stored data of  your device but not from the SDcard. Then again "reboot system now". This should boot your Galaxy Note into normal mode.

Why this happens? 
This might happens in several reasons while you are  upgrading  into a certain firmware update.
1. One of these is that you accidentally interrupt while the phone is in firmware upgrading process.
2. Due of power lose, your device have no sufficient battery charge when you upgrade.
3. Network connection is too weak and or an interruption occurred.
4. If you are using a PC or laptop, it might getting interrupted with another program like anti-virus software.
The rest will be on your own personal experience.

Then try to update the firmware again, 'this time ensure that you have your android device battery fully charge, use a good PC or laptop and a good network connection.

If the above method doesn't works on your Galaxy Note anymore, then I suggest that you should visit your dealer. Explain to them of what really happens when you update your device and ended-up in an undesirable outcomes. Of-course let them fix for it.


How to Take Screenshot on Samsung Exhibit II 4G T679

An Android device like  Samsung Exhibit II 4G SGH-T679 with TouchWiz has a built in screenshot function, but how does it work? This does not require any root or installing any applications just to capture the screen that you might want to save. Sometimes I already accidentally press this buttons and wonder how did I took it and save on my gallery without knowing what are those buttons.


So, here's how to take a screenshots on your Samsung Exhibit II 4G T679, no root and no applications needed or to install required. All you have to do is Press the Home and Power button at same time,  then a camera "flicking" action on the screen should appear. The images captured will be then saved in your phones gallery.

That's it ! too easy isn't it? Enjoy using your phone.

How to Copy Photos/Pictures from PC to Samsung Galaxy Nexus Without Hang, Stuck or Crash

If you ever having an issue of copying a picture from your PC and transfer it to your Samsung Galaxy Nexus and somehow it just hangs while copying photos. Now, the situation is that you can copy the pictures from your Samsung Galaxy Nexus and transfer it to your PC but it won't do the opposite. The ringtones, alarms, notifications and also mp3's just smoothly copied on each specified folders, but only the photos somehow get stuck when you try to transfer and save it to the internal memory storage "pictures folder" or even to the "DCIM/Camera folder".

Some users already had experience on this problem, this might cause by a bug, a firmware issue and the only fix is the sooner release of  firmware update from Samsung. Here's a video example from  jimmylittleUK who also had experience of that said photo copying problem.


As you can see that it only crashes while copying the photos on the "Galaxy Nexus/Internal Storage/Pictures" folder. There is no specific terms of how that problem occurred but only one thing for sure "just another bug on Galaxy Nexus Android OS". Some users already notify and raised this problem on Google's help forum and hoping to have it resolved as soon as possible.

Here's the solution we gathered so far, this solution is simple, already tried and it works in a PC that runs in Windows 7 64-bit OS. Maybe this one might help you too and get rid of that hanging issue.

Assuming that
1) You have already installed the necessary USB driver for your Samsung Galaxy nexus.
2) You already reconfigure the "USB debugging mode" and unchecked it in settings.
3) You use the supplied USB cable of you Galaxy Nexus.
4) You have a enough space of your phone's internal memory card.

Try this:

- Copy the saved photos from your phone's internal memory "photo folder" then transfer and save it to your PC.
- Delete that "Pictures folder" ones all the photos were safety saved then unplug and replug your Galaxy Nexus.
- Then create a new folder on the internal memory and rename it "Pictures". (You are just replacing the old picture folder that you recently deleted)
After that copy all the pictures to the newly created picture folder again.

Another solution:
Try to use any Android file manager application on the Android market, this will sometimes can ease some headaches having it difficult to transfer pictures to your phone.

If all of the above doesn't help you, I have nothing more else to suggest but to let Samsung resolved this issues on our Galaxy Nexus.

Source: XDA-Developer's forum

Samsung Galaxy Nexus User Manual

Here's the Samsung Galaxy Nexus User Manual, this will guide through the rest on how to do some tweaks on your phone. This smartphone was reportedly released  by Verizon in the US,  Bell, Virgin Mobile, Rogers and Telus in Canada. In the UK, the Galaxy Nexus was made available on O2 and Three Network and other European countries.

Here's the topics that describe how to use your Galaxy Nexus phone from Galaxy Nexus official page.

* Get started
o Set up your phone
o Why use a Google Account?
o Get around
o Touch & type
o Use the lock screen
o Search your phone & the web
* Make yourself at home
* Try some apps
* Tune performance
* Learn the Phone app
* Enter & edit text
* Connect to networks & devices
* Search by text & voice
* Manage accounts
* Secure your phone
* Galaxy Nexus User's Guide (PDF)
The user guide of Samsung Galaxy Nexus I9250 android 4.0 Ice cream sandwich smartphone
* Change the wallpaper
* Set ringtone & other sounds
* Make a phone call
* Get your contacts
* Arrange & work with apps
* Add widgets
* Manage notifications

* Start Gmail
* Find People
* Manage your Calendar
* Use your Camera
* Beam screen content
* Manage downloads

* Optimize battery life
* Optimize data usage
* Optimize memory usage

* Dial stored numbers
* Answer or divert calls
* Work with the Call log
* Place an Internet (SIP) call
* Listen to your voicemail
* Dial by voice
* Options during a call

* Use the keyboard
* Type text by speaking

* Connect to mobile networks
* Connect to Wi-Fi networks
* Connect to Bluetooth devices
* Connect to keyboards, mice, and other devices
* Connect to a Windows computer via USB
* Connect to a Macintosh computer via USB
* Share your mobile data connection
* Connect to virtual private networks (VPNs)
* Control airplane mode & other network settings

* Refine Google Search
* Use Voice Actions
* Voice Action commands

* Add or remove accounts
* Configure account sync options
* Change backup & reset options

* Set screen lock
* Encrypt your phone
* Work with certificates

Apps

* Gmail
* Maps
* Google+
* Android Market
* Camera, Gallery, & Movie Studio
* Browser
* People
* Calendar
* Talk
* Messaging
* Music
* Books
* YouTube
* Earth
* Email

Samsung Galaxy Nexus Help Page
Download: GalaxyNexus_Manual.pdf

Download Samsung Galaxy Nexus I9250 User Manual

Here's the Samsung Galaxy Nexus GT-I9250 user manual, the first device to ship with the brand new Android 4.0 Ice Cream Sandwich platform. This smartphone are also known as Samsung Google Nexus Prime, Samsung Google Galaxy Nexus I9250, Samsung Google Nexus 3, Samsung Google Nexus 4G, Samsung Nexus Prime 4G LTE and other variants.  If you have any specific questions on how to do some tweaks on your new Galaxy Nexus, this user manual will guide you in everything you wanted to know about your phone.

The user guide of Samsung Galaxy Nexus I9250 android 4.0 Ice cream sandwich smartphone

Download Samsung Galaxy Nexus User Manual from official Samsung's website download area.
Samsung Galaxy Nexus GT-I9250 Quick Start Guide
http://downloadcenter.samsung.com/content/EM/201111/20111115153841927/GT-I9250_QSG_EU_Eng_Rev.1.0_111029a_Screen.pdf

Samsung Galaxy Nexus GT-I9250 User Manual
http://www.google.com/nexus/help.html

How to connect the Samsung Galaxy Note to PC or Laptop

It's so easy to connect your Samsung Galaxy Note to your PC using a USB cable if you want to browse your data files that has been stored on your phone's microSD card, synchronize your contacts or accounts using Samsung Kies, transferring files such as photos, videos, ringtones etc. To do this you may need to have a kies installed on your PC so that the desired USB driver for your Galaxy Note will be installed as well. You can download Kies program from samsung website. www.samsung.com/kies

Here's how to connect the Galaxy Note to PC and access the memory card. (a removable disk file directory will appear on your PC, separate from internal memory of your phone.
connect samsung galaxy Note to PC
- From idle mode, select Application list.
- Then tap on Settings
- Tap Wireless and Network
- Select USB Utilities
- then select Connect Mass Storage to PC.
Then connect your Galaxy Note to PC with the USB cable or multifunction jack
When connected Touch USB connected or Turn on USB storage

- A USB icon will appear in the top left Notifications area of the screen.
- On the PC, go to My Computer then locate the newly file drive directory that appears as your Galaxy Note mass storage. You can now have the access to browse, sync, copy or transfer files that you want from your Galaxy Note microSD card to your PC or laptop.

How to Take Screenshot on T-Mobile Samsung Galaxy S2 T989

If you'll need to have a screen captured on your T-Mobile Samsung Galaxy S2 (S II) SGH-T989, that's too very easy. You don't need to have it rooted or install any software tools or screenshot capture application just to have a screenshots of your phone.

You can directly take a screenshots right away from your device because the Samsung Galaxy S2 is already has it's own built in screen capture function. All you need to do is just - by pressing the HOME button and then quickly press and release the Power button. (you have to push the power button quickly because the task manager comes up if you keep the home button pushed too long)
T-Mobile Samsung Galaxy S2 T989 taking screenshot buttons
The taken screenshots will then be saved on the phones image gallery folder.
This will also works on AT&T Samsung Galaxy S II SGH-I777 and Samsung Galaxy S II I9100 (global version). This is how tech bloggers and developers do when they want to share a screenshot sample of their newly develop android themes or custom ROMs out over on the internet.

How to increase battery life of AT&T Samsung Galaxy S II SGH-I777

If you had experience and somehow had trouble with the rapidly draining battery of your Samsung Galaxy S2 (SII) by AT&T. In most recent reports that the new AT&T Samsung Galaxy S II had a poor battery life.
Others says that this is due to a poor system OS or some bugs issues that one of the main reason why your phone drains its battery so fast.
Improved batteyr life AT&T Samsung Galaxy S II SGH-I777
So, how to get your Samsung Galaxy S2 I777 improved the battery life performance?
Here's a few tweaks we gathered so far and shared by Singuy1234 who already had his Samsung Galaxy S2 battery life problem fixed.

My phone is no longer draining massive amount of battery life when idle (3-5% after 7 hours of idle), android system usage is now down to 5-15% instead of 78-97% from before.

My fixes.

1. Turn off data syncing
2. Turn off wifi while on the road (so wifi doesn't constantly look for signals).
3. Clear memory

Yes, att installs a lot of bloatware that constantly update for changes.

If killing those services AND disabling data syncing doesn't help your problem, then you have a kernel problem (like myself).
If this is the case, do the following:


1. Take phone back to AT&T and get a replacement
OR
2. Re-flash your android with the STOCK kernel found here

http://forum.xda-developers.com/show....php?t=1286432
OR
3. Reflash with cognition x2 (reported to solve a member's problem, I didn't try this myself).

You can read the whole story at XDA-developer. We'll hope that Samsung will release a  new firmware update that fix for this battery draining issue a soon as possible.

How to Hard Reset Verizon's Samsung Stratosphere i405

Here's a simple tip on how  to factory reset the Samsung Stratosphere i405 from Verizon.
The Samsung Stratosphere is Verizon’s first 4G LTE slider.  This new Android handset runs on Android Gingerbread, a WVGA display Super AMOLED Plus, 5MP rear camera, and a 1.3MP front-facing camera.

But however, if you'll experience any low performance, hang or frozen problem, a factory reset may help to restore back your Samsung Stratosphere to it's original factory default settings. But just ensure to have a back copy of all your important data files like contacts, messages, etc. that are stored in the handset for it will be all deleted on this process.

samsung Stratosphere i405 hard reset
Here's  how to reset your Samsung Stratosphere

 Factory reset
-From the Home Screen, tap Settings
-then scroll to and then select Privacy
-then scroll to and select Factory Data Reset
-then select Reset Phone
-then select Erase Everything

Hard Reset
You can either type and enter this code *2767*3855# or do a button combination below if the Samsung Stratosphere experience hang problem like just stuck on the start up logo.

Download T-Mobile Samsung Galaxy S II t989 User Manual

If you have bought T-Mobile Samsung Galaxy S II SGH-T989 already and somehow looking for the user manual so that you'll learn how to tweaks your newly android phone and have fun making use of it, download the user's guide from the link below.

The T-Mobiles Samsung Galaxy S II is also known as "Hercules" - this devices comes with 4.52 inches display screen with a little bit more curved in the four corners body unlike the size of  Galaxy S2 Sprint D710 and Galaxy S2 AT&T which has  4.3″ only, so do the SGS2 GT I9100 International version.  But still it uses Super AMOLED Plus Capacitive Touchscreen with TouchWiz UI v4.0 and protected with scratch-resistant surface via Corning Gorilla Glass Display. For the screen resolution, and equipped with WVGA touchscreen in  (800 x 480 pixels) pixel resolutions. Isn't it nice!

We'll here's your T-Mobile Samsung Galaxy S II t989 User Manual - T989_English_User_Guide.pdf
Samsung GAlaxy S II SGH-T989ZKBTMB User Manual
Samsung Galaxy S II SGH-T989 by T-Mobile User Manual

how to set a different ringtones on you Samsung Galaxy Gio S5660

 This just a simple tips on how to set a different ringtones on you Samsung Galaxy Gio. If you already downloaded your favorite MP3 songs on your PC and want to transfer it in your Galaxy and customize at as your personal message or alert tones,  all you have to do is connect your Samsung Galaxy Gio to your computer or laptop via USB cable and then select "connection type" and get access to storage memory card.

Here's how to connect Galaxy Gio into Mass Storage Mode Option:

- On Main Home Screen tap Menu > Settings > Application
- Enable USB Debugging
- Return to Home Screen
- Then plug the USB cable into your Galaxy S2
- Pull down status bar
- Press ' Connect USB Storage' button
samsung galaxy gio freeze and hang on logo fix
Alternative way without USB Debugging
- Go to Settings > Wireless & Network
- USB utilities and click the button >
- then plug in USB cable

Once you've establish a connection from you Galaxy Gio to your PC, just browse to your mass storage
then find the folder "Notifications", if its not on there, create a new folder and simply renamed it "Notifications".

>SDCARD/ MEDIA/ AUDIO/ NOTIFICATIONS

Then grab a copy music files you wanted from your computer and paste into that folder "Notifications". Once finishes, disconnect your Galaxy Gio from the computer. Then you can set that music files as your message tone.

- Go to Message/Inbox icon located at the bottom of your Samsung Galaxy Gio screen

- In the Message/Inbox Settings simply choose the file that you've copied as your message ringtone

If you already have a music files stored on your Samsung Galaxy Gio S5660, do this steps below:
- Go to "My Files" then copy that mp3 music file you like to use as your messages ringtone.
( Just tap and hold that music file then you can choose either to copy or move that music file)
- Next, paste that music file in your media folder > SDCARD/ MEDIA/ AUDIO/ NOTIFICATIONS
- Go to Message/Inbox icon located at the bottom of your Samsung Galaxy Ace screen

- In the Message/Inbox Settings simply choose the music file that you've copied as your message ringtone
If you have a problem about the volume loudness, this sometimes happens that your custom ringtone volume is too low compared to the pre-installed ringtone on your Galaxy Gio which as much louder.
You can try using this program, MP3GAIN, to boost up maximized the volume of your mp3's decibels.
http://mp3gain.sourceforge.net/download.php

Or this app from Android Market..Volume+ (Sound Boost)
currently using this app for my boosted up mp3s using MP3GAIN.
But works only on Gingerbread..
https://market.android.com/details?id=com.TEST.android.lvh&feature=search_result

How to Fix a Frozen, Hang in Logo Problem on Samsung Galaxy S II / S2 I9100

 The Samsung Galaxy S2 is a high-end Android device because of it's1.2 GHz dual-core System on a chip processor. It also features 1 GB of RAM, but sometimes it also experience some hang or frozen problem. It just sometimes freezes without no means, and this reportedly happens very rare. This may occurred due to the phones memory getting too, low like for example, running multiple applications,  scrolling down long texts or phone book that happens once in a while, etc.

Once your Samsung Galaxy S II is frozen it become unresponsive, the first thing you only have in mind is to restart the phone. You may either pull out the battery and insert it back again, or just by pressing the power button will also do.

This are just simple tips  on how to solve on a Hanged or Frozen Samsung Galaxy S II:

A.  You may need to reboot the phone by pressing the power button until the device turned OFF and reboot automatically.

B. Perform a factory data reset. This will restore back and reset the Galaxy S2 to its factory default settings.
1. Select Settings then Privacy
2. Select Factory Data Reset
3  Select Reset Phone
4. if the password is prompted just enter it then select Erase Everything to confirm.

C.  Hard reset the device by way of button combination- this can be useful if the procedures above doesn't fix the problem.  Just ensure to have a back up copy of all of your important data stored on the device for this will wipe and delete all of it.

-Press and hold the Volume Up and Home button
-Then press the Power button
-Release the Power button until the device Turns On.
-You will then see a window called "recovery menu" on your Galaxy S2.
The options is in there to, Wipe Data/Factory reset, Reboot. Just select Reset Factory. Then reboot.
Samsung Galaxy S2 hang frozen fix
If the above procedures like factory reset or hard reset doesn't fix the frozen problem.
Our next option for this is by restoring the device original stock-firmware. This will clean up and return the phone to its original factory fresh like the way you bought it brand new. A Samsung flasher tool called ODIN Multidownloader can do the job.  You can find some tips on how to restore back the device Firmware flashing or downloading procedure on Samsung Galaxy S2.

Sometimes there are severe hang or frozen problem that is due to hardware issue if the device suffered  wet or water damaged, heavily dropped and oxidation build ups inside the phones PCB board, and this problem can only be fix by hardware calibration. A mobile phone technician in a service center with a good soldering skills can only fix it.

How to Format or Reset Samsung Galaxy S Plus I9001

Here's the following simple tips on how to do a factory reset or format the Samsung Galaxy S Plus I9001 and restore it back to it's original factory default settings. This procedure may help if you'll experience some slow performance, fix lags, hang or frozen issues. This may also wipe any unwanted firmware interruption due of some applications you've installed on the phone that result to some poor performance issues.

Note: Just ensure to back up all of your important data stored from the phone, for this will wipe it all out and clear you device and stored back again like the first time you bought it.
Samsung Galaxy S Plus I9001 factory reset
So, here's the factory reset method:
Factory reset - this is only a soft reset method, you can do this if the device is still active or you can still navigate to it's menu and settings function.

-Tap the Menu key
-Tap Settings
-Scroll down to and tap Privacy
-Tap Factory data reset
-Tap Reset phone
-Tap Erase everything.

You can also do a factory reset while only typing this reset code on the dial pad #2767*3855#.

If the Samsung Galaxy S Plus I9001  is frozen or stuck on boot or hangs on welcome screen logo only. This time you will need to hard reset it by way of button combination since you cannot do a factory reset from the instruction above.

- Turn your Samsung Galaxy S Plus I9001 off, or remove the battery for about 10 seconds then put it back again.
- Then press and hold the following buttons Home button + Volume up + Power button
Then a menu will show, just select Wipe Data/Factory Reset.

That's it! You can also download the user manual for Samsung Galaxy S Plus I9001  here,  if you need more information on how to do some tweaks on your Galaxy S Plus android device.

Download Samsung Galaxy S Plus I9001 User Manual

If you have recently bought the Samsung Galaxy S Plus I9001 which runs on Android 2.3 Gingerbread OS and was sold on T-Mobile, Orange and Vodafone. As a new user of Android device, you will need this user manual so that you will know how to navigate of its functions. This android device is built with 1.4GHz processor has its popping touchwiz 3.0 on the top of the Android experience.
Samsung Galaxy S Plus I9001 User Manual download
So, here's the Samsung Galaxy S Plus I9001 User Manual that you're looking for.
I9001_UM_EU_Gingerbread_Screen.pdf
This Samsung Galaxy S Plus I9001 user manual is very useful if you will encounter some problem and if you don’t know how to do some tweaks on it, you can try to find the answer in the user manual.

How to Increase or Boost a Low Microphone Volume on Samsung Galaxy S II

If you are having some issue with your Samsung Galaxy S II which has a low microphone volume level and finding some complaints from people you call saying that they can't clearly hears you. It is quite sometimes that some users experience this problem regarding the loudness of their Galaxy S II microphone.

This problem may only occur during "in call" status while if you run the voice recorder application and speak normally you will find that it records well quite very clearly. Some forum reports said that they have return back their Galaxy S II for fix about the low microphone. But here's some tricks that you may try first and see if this works before you have to decide to have it back  to your service center.

This tricks are too simple and nothing to worry about, just do some click around with your menus, and do this steps below:

1. Setting the mic input level while the 'Noise Reduction' is turned off. You can do this by pressing the menu button while in call status then press the "Noise Reduction Off".
Samsung Galaxy S2 increase microphone volume
- Type this code on your Galaxy S2  dial pad *#*#197328640#*#*
- A number coded menu will then show.
- Now press  [5] AUDIO
- Next [1] NB (VOICE CALL)
- Next [1] HANDSET
- Next [1] VOLUME
-Next  [1]SRC SPEECH RX Volume
- Then [5]5_lvl: 90 ( the 90 is the input value of the microphone volume level, yours might have a different value than 90. Just remember the default value of yours so that you can use it to revert it back again)

Now, on that window there's a line stated "Input". You are going to edit or change the input value which can be done by pressing the Menu button, then the "Key Input". Write down 110 as your new maximum microphone input level and then press "OK" This is just like adjusting the volume knob of your audio amplifier to maximize the loudness.

2. Setting the mic input level while the 'Noise Reduction' is turned On.

- Press the menu button then the "Back". You may press 4 times until you will  return back from where you will see the Audio Setting  and the [1] NB (VOICE CALL) is in the first line.
- This time, press [7] HANDSET(2MIC)
- Next [1] HANDSET
- Next [1] VOLUME
- Next  [1]SRC SPEECH RX Volume
- Then [5]5_lvl: 90( Edit this input value like the number you have just write down from above)
Press the Menu button, then "Key Input". Write down 110 as your new maximum microphone input level.

I have proven that this tricks works on my Galaxy S II android phone, but the only certain issue is that it will automatically revert back to the default input level settings once you rebooted or restart the phone . So if you want to keep it permanent, find a way to never restart your phone, or consume your phones battery life. So, hope this works for you too.